When choosing a cat portrait painting, start with the features that make the face familiar to you: the eye shape in a favorite photograph, the width of the muzzle, an uneven patch beside the nose, or the outline of the cheek fur. Choose a main reference, point out those details, and use them to guide your preview review.
A beautifully painted cat can still feel unfamiliar if those relationships change. You do not need an anatomy vocabulary to explain the difference. A few clear observations about your own cat give the artist a more useful starting point than a breed name alone.
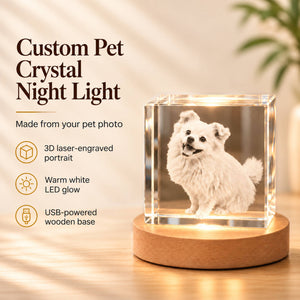
Image note: Product display scenes use AI-assisted styling. The artwork comparison shows a supplied completed portrait, not a pre-production preview.
Choose the Details You Want the Artist to Keep
Begin with two or three priorities rather than a demand to make every hair equally detailed. Perhaps the sleepy gaze matters most, followed by a narrow white stripe and the rounded chin. Write those down before browsing other people's portraits.
Eyes and the Expression in Your Chosen Photo
Look at the outline of each visible eye, how far it is open, and where the cat is looking. Compare the upper eyelid, inner corner, and space between the eyes and nose. If you want the half-closed eyes in the main photograph, say so before asking for a brighter or more alert interpretation.
Do not treat eyes from different poses as interchangeable. A close-up can clarify a visible detail without becoming an instruction to replace the main expression. Likewise, reflected highlights belong to the photographed lighting; decide with the artist how they will be interpreted within the chosen style.
If you are taking new references, Sony's pet photography guidance recommends focusing on the eyes and photographing from the pet's level. For a commission, use that advice to obtain readable detail while keeping the expression you actually want.
Muzzle, Chin, and Ears
Follow the nose outline down to the mouth and chin. Notice the width of the whisker-bearing areas beside the nose, whether the chin appears broad or narrow in this view, and how the cheeks meet the muzzle. Ask the artist to compare those shapes before adding more fur detail.
Then check the ear tips, their spacing in the chosen view, and the visible hair around them. An ear angled sideways may be part of the moment you love. Explain whether to retain it; do not assume the artist should make both ears match. If you want another ear position, supply a reference and discuss that change.
Markings, Coat Outline, and Whiskers
Trace a few recognizable boundaries: a forehead stripe, an off-center white blaze, the edge of a cheek patch, or a dark area beneath the chin. Use the photograph's left and right sides when describing them, so the artist knows which area you mean.
The UC Davis Veterinary Genetics Laboratory notes that cats have varied coat colors and patterns, and that coat-color terminology can differ between registries. For your brief, a labeled image can be clearer than relying on a pattern name to describe where a particular patch belongs.
Also compare the outer shape of the cheek fur and neck ruff. If your photographs show different ages or grooming stages, choose which appearance to preserve. Do not ask the artist to infer the preferred coat from an unlabeled mixture.
For whiskers, agree on the visible sweep and the level of detail you want. In a painted interpretation, you can prioritize their direction and separation from the background without specifying an exact count. If one unusual whisker is personally important, identify it explicitly. Our cat painting background guide explains the separate decision about what surrounds those edges.

Give Each Reference Photo One Clear Job
A small, labeled selection is easier to discuss than a folder with no explanation. Choose a main reference for the pose and expression, then add photographs that answer specific questions.
| Photo role | What it clarifies | What to tell the artist |
|---|---|---|
| Main reference | Head angle, gaze, expression, and intended crop | “Use Photo 1 as the basis for the pose and expression.” |
| Face detail | A visible eye, nose marking, or ear tip | “Photo 2 clarifies this detail; keep the expression from Photo 1.” |
| Marking reference | A cheek, chin, or chest patch hidden in the main view | “Use Photo 3 to check the patch under the chin.” |
| Different-age or grooming reference | An alternative appearance, or a detail needing context | “This is an older photograph. Please do not use its fuller coat unless we agree to that change.” |
These roles are a communication tool, not a rule that every commission needs four photographs. One clear image may be enough for the selected view. Conversely, several photographs may still leave a hidden detail uncertain.
If you need new pictures, our guide to cat portrait photography for shy or restless cats covers the practical shooting steps. Here, the priority is explaining how the references should be used together.
Resolve Conflicting Colors and Missing Details Early
Two photographs of the same cat may suggest different colors. Sony's white balance explanation shows how lighting and white balance affect recorded color, including examples of the same cat photographed with different settings. A photograph is not automatically a reliable color standard simply because it was taken outdoors.
Tell the artist which image most closely matches what you remember or see in person, if you can. For example: “Photo 1 sets the pose, but Photo 2 is closer to the cream color of the chest.” If you cannot resolve the difference, flag the uncertainty instead of prescribing an invented exact shade.
Send original files where available. Compare them with any edited versions before choosing a reference, particularly around fine whiskers, ear hair, and coat edges. If a preferred image has lost those details, another photograph may help explain them.
For an old or blurry image, ask the artist what it can support before ordering. They may suggest a closer crop or a simpler interpretation. A cheek hidden from the camera, however, is not documented by sharpening the visible side. Distinguish details supplied by another reference from details that would require an agreed interpretation.
Combining a head angle, body pose, or ear position from separate photographs is also a design request. Ask whether the combination works visually and what the commission includes. An auxiliary photo should not silently change the chosen life stage or expression.
Review the Preview From the Whole Face to Fine Lines
Before reviewing a custom cat painting, confirm what the preview shows: an early layout, work in progress, or completed artwork awaiting approval. Those stages can allow different kinds of changes. Ask about the process rather than assuming a preview always comes before painting begins.
Keep the agreed references beside it and work through these six checks:
- Overall silhouette: Compare the head width, cheek outline, head tilt, and connection to the neck or chest. Start with the whole composition.
- Ears and muzzle: Check the ear tips and spacing, nose outline, muzzle width, and chin. Identify the specific shape that seems different.
- Eyes and gaze: Compare the visible eyelid contours, opening, and direction of the gaze with the main reference. Check agreed color details against the designated supporting photo.
- Marking boundaries: Follow the named stripes and patches. Is the off-center feature still off-center? Is the chin patch on the intended side?
- Coat outline: Check cheek volume and the neck ruff against the chosen age or grooming reference. More painted fluff is not automatically a closer match.
- Whiskers and readable edges: Look at their sweep and whether important light or dark edges remain visible within the agreed background and style.
First view the complete portrait at a comfortable size, then zoom in for individual details. A close-up may make a whisker easy to inspect while hiding a broader change in head proportions.
The checklist is an editorial aid, not a likeness score. Apply it to the chosen style: a loose interpretation may simplify lines deliberately. The question is whether the simplification preserves the details you agreed mattered.

Give Specific Feedback Before Approving
“Something is off” is a useful first reaction, but a location and reference make it easier to discuss. Separate a request to follow the agreed photo from a new design preference.
The following are illustrative examples for buyer communication, not customer quotations:
- Eye shape: “Please compare the eye on the left side of Photo 1. Its upper edge is flatter than it appears in the preview. I would like to keep that half-closed shape.”
- Marking boundary: “Photo 3 shows the white patch ending beside the nose, rather than continuing across the whole muzzle. Could you check that edge while keeping the pose from Photo 1?”
- New design request: “We agreed to the ear position in Photo 1. I am now considering the position in Photo 2 instead. Is that change practical at this stage, and would it change the agreed scope?”
Send a short, prioritized set of notes. Ask which adjustments are possible and covered before approving, especially if you want to change the main photograph, background, or composition.
Style and format remain separate choices. A realistic cat painting can simplify a marking, while a looser portrait can preserve it carefully. Hand painting or physical depth alone does not establish likeness. For a broader format decision, see our comparison of 2D and 3D cat portraits.
PetPortraArt offers a custom hand-painted layered pet portrait from pet photographs, with a preview for approval before shipping. Start your cat portrait painting brief with the reference and familiar details you want preserved, then check the current product page for the applicable order and revision terms.
Cat Portrait Painting FAQs
How can I explain what makes my cat look different from a similar cat?
Choose two or three visible priorities, such as a half-closed eye, muzzle shape, or uneven chin patch. Mark their locations on a copy of the reference and describe which photograph should guide the artist. Send the original file as well.
What if my cat's eyes or coat look different in separate photographs?
Tell the artist which photo looks closest to your cat in person or in your memory, if you know. Label it as a color reference while keeping the chosen pose separate. If you are unsure, explain the conflict rather than asking the artist to invent an exact color.
Does the artist need to copy every whisker exactly?
Agree on the detail level for your chosen style. You can prioritize the visible whisker sweep and separation from the background without requiring an exact count. If a particular whisker matters to you, identify it and ask whether the reference shows it clearly enough.
Can I commission a portrait from one old or blurry photo?
Ask the artist to assess the image before ordering. The visible detail may support a closer crop or simplified interpretation, while hidden or heavily blurred features remain uncertain. Supply other photographs of the same cat when available, with their intended use explained.
Can the artist combine my cat's pose and expression from different photos?
Possibly, but it needs agreement. Identify the elements you want combined and ask whether they form a convincing composition. Confirm the service scope and any additional work before assuming that a multi-photo combination is included.
What should a portrait preview show before I approve it?
First confirm the preview's production stage. Compare the composition, head shape, ears, muzzle, eyes, markings, coat outline, and whiskers with the agreed references. Give specific feedback and ask which changes are possible before approval.